Showing posts with label DIY. Show all posts

Sunday, 9 February 2014

DIY: I Carry Your Heart on a Kraft Card

I carry your heart

Perhaps like us, you are already carrying around photos or polaroids of you and your loved one. How else could you be carrying a lil piece of your loved one around, to remind you of their ever assuring presence and your ever lasting longing? I took a little hint from one of our favourite poems [i carry your heart with me (i carry it in] by E. E Cummings, and created a lil something for Galen and I.


DIY Craft Supplies

DIY: Kraft Card Love Message

Supplies:
1. Kraft Card
2. Stamps
3. Ink
4. A loved one (prefably one who likes craft too)


DIY kraft card supplies

Steps:
1. Cut the kraft cut into the desired size and shape (85.60 × 53.98 mm for credit card size)
2. Stamp your favourite message in your favourite ink colour
3. Sit your loved one down (blindfold optional but highly advisable)
4. Stamp your thumbprints, overlapping to form a heart shape


i carry your heart (i carry it in my heart)

Galen and I have this thing for materialising poems and quotes into something tangible. I certainly think this is such a poignant visualization of the poem, ain't it? And a pleasant surprise too, when you removed the blindfold from your loved on. Warmness oozing from within the heart is almost a guarantee.

Thursday, 6 February 2014

DIY: I Freeze my Love for You

Freeze my LOVE for you

I had been hearing so much about this amazing material that allows all sorts of stencils to be done on any surface. Of course I had to hunt it down, and I was so happy to find the freezer paper at Cold Storage.


The freezer paper came in really handy- I was obsessed with this 'LOVE' symbol by Dirk Bell. And I knew that I had to DIY something for Galen based on it.


Template for Freezer Paper

The original Dirk Bell LOVE symbol is a little thin and so I thickened it. I then traced it onto a sheet of freezer paper.


You can easily cut the freezer paper using a normal scissors or penknife. It took a little patience and effort to straighten the lines and the curves.


Iron the freezer paper with the adhesive side of the freezer paper facing down (the paper side facing up) on whatever material that you'll like your stencil to be on. I chose to have my LOVE stencil on a rectangular cork board. Iron on low heat setting.


I chose white as I wanted to retain the neutral tone of the cork bone. I used a sponge to sponge in the colour to mimic the cork texture.


As tempted as you may be, it is best to leave the stencil to dry overnight before removing the freezer paper. I waited (impatiently) and slowly savoured the moment of peeling the freezer paper off.

DIY: Freezer Paper Stencil on Cork Board

Supplies:
1. Freezer paper (size dependent on the design)
2. Cork Board
3. Iron
4. Poster paint (colour of your choice)
5. Sponge

Steps:
1. Trace your design onto the freezer paper
2. Cut out your design from the freezer paper
3. Iron the freezer paper (adhesive side down) using low heat
4. Paint the corkboard using the sponge
5. Wait (patiently) for it to dry overnight
6. Peel and present to your love!

I was pleased with the result, and I know that Galen would love it too. Such poignant rendition of the visual poetry, ain't it?

Sunday, 15 December 2013

DIY: Coffee Bean & Tealight Candle (Coffee-scent Your Room!)

Coffee-scent Your Room!

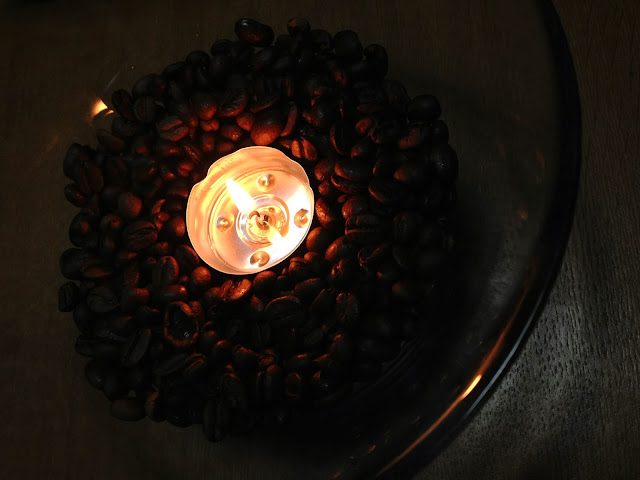
Galen loves the smell of cafés. The aroma of coffee, cakes, and wood perks him up and keeps him energetic. I had been looking for ways to recreate the scent for him, to create a little café in his room for him to work in. We went shopping at Ikea, and spent the longest time finding the perfect bowl to hold the coffee beans and tealight candles.

Supplies from Ikea

Galen wanted a clear one so that the coffee beans and tealight candles can be seen from all angles. He also wanted it medium sized (not too big, not too small) such that it will sit elegantly on the wooden shelf. We finally found the one, a salad bowl but nonetheless the perfect one for our coffee scent project.

Coffee Beans & Tealight Candle

DIY: Aromatic Coffee Bean Tealight Candle

Supplies:
1. Bowl (the perfect one)
2. Coffee Beans (whole beans)
3. Tealight candles (vanilla flavour would be yums!)

Steps:
1. Wash and dry the bowl
2. Fill half the bowl with coffee beans
3. Place one tealight candle in the middle of the beans
4. Light it up and enjoy- you've a café in your room!

DIY Aromatic Coffee Bean Tealight Candle

As the tealight candle burns, the metal holder gets heated up slightly. This will warm the coffee beans, producing a slight coffee fragrance. Place the coffee bean filled bowl in a well-ventilated place, and soon the fragrance would fill your room. Now, get a hot cup of coffee, a good movie, and snuggle up with your loved one.


Thursday, 12 December 2013

DIY: Origami Heart

My lil cousin, Variel, is quite an artist for her age.  Her drawings have won her family air tickets to Taiwan and Turkey in a competition and she is only 7 this year. One night, she brought a box full of Origami instruction books and Origami paper over to my place. She proudly proclaimed that it was her treasured find at Daiso, and that the dollar shop is her favourite shop because “everything is so nice and is only $2”. Such an adorable angel, isn’t she?

Red Origami Heart

I asked Variel if she could make an Origami for me. She flipped through a few of her books, and explained to me that the patterns are arranged according to the difficulty level. She finally picked the Origami heart and asked what colour I would like it to be. “Red” I said, and she went about her craft. She was following each step printed in the instruction book very carefully, as if threading on thin ice. She was channeling all her energy and attention between the full colour Origami book and the tiny slip of red paper. “There!” she handed me the red heart after a couple of minutes, and beamed so happily I could barely see her eyes. She is such a sweetie pie.

Bus Ticket Origami Heart

Galen and I were on our way to dinner one evening when he realized that his transport card had ran out of value. He had to pay in cash and was given a bus ticket. A rare item in this era when everything goes cashless. He held on to the tiny white slip and I asked if he could make an origami heart for me. He looked at me with his eyes slightly widened, and I said “That’s what a boy would do when he takes the same bus as the girl he likes right?”

Galen worried for a few seconds at the possibility of a bus conductor, but got down to making it. Though he had all his attention on that tiny bus ticket, but unlike Variel, he was not following any known Origami steps. He just has this thing for making or doing things his way when it comes to crafting or creating. “Here!” he handed me his version of the origami heart a few seconds later and beamed proudly too. I held on to it dearly, knowing that this origami heart is the one and only in the entire world (universe even), created and given to me specially.

Now, there really is no boundary when it comes to crafting. We could have a full colour step-by-step guide, but that does not mean we do not get frustrated at it for being unclear, or frustrated at ourselves for not having a brilliant mind or nimble fingers. We could have nothing at all, just some random material, and we could just let our minds and hands carry us, and create whatever that they could come up with. Either way, don’t stop crafting, don’t stop creating, and don’t stop giving.